Vulnhub’s Photographer Write-Up OSCP-Prep VM

Photographer is a vulnerable VM released on Vulnhub last month by v1n1v131r4. This is supposed to be an OSCP prep machine that helps students looking to take the certification get a little experience beforehand. Let’s take a look at it and see how preparing it can be!
You can download Photographer from here:
Tools Used:
Nmap, Dirb, Nikto, Burp Suite
Enumeration
We’ll start out with a pretty simple Nmap scan to see what’s open:
user@kali:~$ nmap -sV -Pn -A -p- 192.168.1.185
Starting Nmap 7.80 ( https://nmap.org ) at 2020–08–25 14:24 EDT
Nmap scan report for photographer.attlocal.net (192.168.1.185)
Host is up (0.0018s latency).
Not shown: 65531 closed ports
PORT STATE SERVICE VERSION
80/tcp open http Apache httpd 2.4.18 ((Ubuntu))
|_http-server-header: Apache/2.4.18 (Ubuntu)
|_http-title: Photographer by v1n1v131r4
139/tcp open netbios-ssn Samba smbd 3.X — 4.X (workgroup: WORKGROUP)
445/tcp open netbios-ssn Samba smbd 4.3.11-Ubuntu (workgroup: WORKGROUP)
8000/tcp open http Apache httpd 2.4.18 ((Ubuntu))
|_http-generator: Koken 0.22.24
|_http-open-proxy: Proxy might be redirecting requests
|_http-server-header: Apache/2.4.18 (Ubuntu)
|_http-title: daisa ahomi
|_http-trane-info: Problem with XML parsing of /evox/about
Service Info: Host: PHOTOGRAPHER
Host script results:
|_clock-skew: mean: 1h20m00s, deviation: 2h18m34s, median: 0s
|_nbstat: NetBIOS name: PHOTOGRAPHER, NetBIOS user: <unknown>, NetBIOS MAC: <unknown> (unknown)
| smb-os-discovery:
| OS: Windows 6.1 (Samba 4.3.11-Ubuntu)
| Computer name: photographer
| NetBIOS computer name: PHOTOGRAPHER\x00
| Domain name: \x00
| FQDN: photographer
|_ System time: 2020–08–25T14:24:42–04:00
| smb-security-mode:
| account_used: guest
| authentication_level: user
| challenge_response: supported
|_ message_signing: disabled (dangerous, but default)
| smb2-security-mode:
| 2.02:
|_ Message signing enabled but not required
| smb2-time:
| date: 2020–08–25T18:24:42
|_ start_date: N/A
Service detection performed. Please report any incorrect results at https://nmap.org/submit/ .
Nmap done: 1 IP address (1 host up) scanned in 20.38 seconds
user@kali:~$
Looks like we have a few ports open:
Port 80 — Web server running Apache httpd 2.4.18
Port 138 — SMB share
Port 445 — SMB share
Port 8000 — Web server also running Apache httpd 2.4.18
Let’s go straight down the line and see what’s what. We can start out with port 80 and run a dirb scan:
user@kali:~/Desktop$ dirb http://192.168.1.185
— — — — — — — — -
DIRB v2.22
By The Dark Raver
— — — — — — — — -
START_TIME: Tue Aug 25 14:32:57 2020
URL_BASE: http://192.168.1.185/
WORDLIST_FILES: /usr/share/dirb/wordlists/common.txt
— — — — — — — — -
GENERATED WORDS: 4612
— — Scanning URL: http://192.168.1.185/ — —
==> DIRECTORY: http://192.168.1.185/assets/
==> DIRECTORY: http://192.168.1.185/images/
+ http://192.168.1.185/index.html (CODE:200|SIZE:5711)
+ http://192.168.1.185/server-status (CODE:403|SIZE:278)
— — Entering directory: http://192.168.1.185/assets/ — —
(!) WARNING: Directory IS LISTABLE. No need to scan it.
(Use mode ‘-w’ if you want to scan it anyway)
— — Entering directory: http://192.168.1.185/images/ — —
(!) WARNING: Directory IS LISTABLE. No need to scan it.
(Use mode ‘-w’ if you want to scan it anyway)
— — — — — — — — -
END_TIME: Tue Aug 25 14:33:01 2020
DOWNLOADED: 4612 — FOUND: 2
user@kali:~/Desktop$
Well…dirb didn’t really give us anything on port 80, but let’s take a look just in case:

By all of that Latin text, it seems that we’re dealing with a brand new site. I head over to the /images directory and see a list of default pictures:

Just to make sure that I didn’t miss anything on the web server, I went ahead and ran a Nikto scan on it:
user@kali:~/Desktop$ nikto -h 192.168.1.185
- Nikto v2.1.6
— — — — — — — — — — — — — — — — — — — — — — — — — — — — — — — — — — — — — -
+ Target IP: 192.168.1.185
+ Target Hostname: 192.168.1.185
+ Target Port: 80
+ Start Time: 2020–08–25 14:40:22 (GMT-4)
— — — — — — — — — — — — — — — — — — — — — — — — — — — — — — — — — — — — — -
+ Server: Apache/2.4.18 (Ubuntu)
+ The anti-clickjacking X-Frame-Options header is not present.
+ The X-XSS-Protection header is not defined. This header can hint to the user agent to protect against some forms of XSS
+ The X-Content-Type-Options header is not set. This could allow the user agent to render the content of the site in a different fashion to the MIME type
+ No CGI Directories found (use ‘-C all’ to force check all possible dirs)
+ IP address found in the ‘location’ header. The IP is “127.0.1.1”.
+ OSVDB-630: The web server may reveal its internal or real IP in the Location header via a request to /images over HTTP/1.0. The value is “127.0.1.1”.
+ Server may leak inodes via ETags, header found with file /, inode: 164f, size: 5aaf04d7cd1a0, mtime: gzip
+ Apache/2.4.18 appears to be outdated (current is at least Apache/2.4.37). Apache 2.2.34 is the EOL for the 2.x branch.
+ Allowed HTTP Methods: GET, HEAD, POST, OPTIONS
+ OSVDB-3268: /images/: Directory indexing found.
+ OSVDB-3233: /icons/README: Apache default file found.
+ 7915 requests: 0 error(s) and 10 item(s) reported on remote host
+ End Time: 2020–08–25 14:41:20 (GMT-4) (58 seconds)
— — — — — — — — — — — — — — — — — — — — — — — — — — — — — — — — — — — — — -
+ 1 host(s) tested
Nothing really jumped out at me, so I decided to move on to the SMB shares. SMBClient is kind of temperamental so I like to use the GUI version. I opened a File Explorer menu and clicked the Other Locations icon on the bottom left:

Click on the Connect To Server icon on the bottom and type the IP of the target:
smb://192.168.1.185

Click “Connect” to connect to the share:
We can now see the shares:

There’s probably nothing on the Print share so let’s go with the sambashare. We are met with a login prompt:

Just click Connect and you will have access to two files:

Open the mailsent.txt document and you’ll see a message from somebody named Agi Clarence to Daisa Ahomi:

This message also gives us an email and a subtle hint: “Don’t forget your secret, my babygirl.” Could it be a password? Let’s move on see what else we can find.
Also in the folder is a WordPress backup file. I went ahead and extracted it to my Kali box for later exploration.
Let’s explore port 8000 and see what’s on the web server. A quick once-over gives us a pretty simple looking blog:

We can see down at the bottom that the blog was built with Koken. Let’s see if we can get a version number from the blog by using the source code. If you right click on the page, you can select “View Page Source” from the menu.

About halfway down the source code we can see the version number, Koken 0.22.24:

Okay, now we’re getting somewhere. Let’s do a search on Exploit-DB to see if there’s an exploit for this:

There is an exploit for this version number, however, it’s an authenticated exploit. This means we need credentials. So, before we can move on, we need to find a login page and we need to find credentials. Let’s run Nikto on this port to see what it finds:

All right! Nikto found a few things here. Let’s check out the /admin/ directory. This probably has a login page associated with it.

It sure does! Okay, so the prompt is asking for an email and a password to login. Going back to what we found on the SMB share, we have an email for Daisa at daisa@photographer.com. Seeing as how her name was on the site, we can assume maybe her email could work.
Now, we just need a password. Remember that cryptic last sentence in the email? Let’s try babygirl as the password and see if that works.
All right! We’re in:

Let’s check out that exploit from Exploit-DB to see what we need to do in order to upload a file.

Okay, so the exploit is telling use that we need to build a malicious PHP file. The cmd command that they are talking about in the exploit will simply give us remote command execution. Why not just go for a reverse shell? Let’s start by getting our PHP file ready.
Go to /usr/share/webshells/php and copy the php-reverse-shell.php file to your home directory. Open it and change the IP to your own Kali box’s IP:

Keep that file handy and let’s open up Burp Suite:

Burp Suite should be on your dock, if not you can search for it in the Applications menu. Once it’s opened, accept the EULA and just hit Next on the menu. Click Start Burp and we’ll be on our way!
Since Burp is a proxy program, we need to configure our Firefox browser. Click the menu button the right hand side of the Firefox window:

Scroll down to Preferences and click on it:

Now you should be in the Preferences window:

Scroll all the way down to the bottom of the window and you should see the Network Settings. Click Settings:

In this new menu, you’re going to select Manual proxy configuration and you’re going to enter your Kali machine’s loopback address and a port that you aren’t using. Port 8080 works well:

Click OK to save the settings. Keep this window open.
According to the exploit, we need to re-name our reverse shell. Their naming convention is image.php.jpg. Let’s just stick with that.
You can right click your shell file to bring up the rename option:


We should be good to go now. Let’s head back to the blog. On the bottom right hand side of the screen there is a button that says Import Content.

According to the exploit, we need to use this to upload our shell. Let’s click on it and then we can just drag our shell over to the window. If all goes well, you should have your shell code file queued in the importer:

All right, before we get this file onto the server, we need to changed the name. We used the .jpg extension to trick the importer into allowing us to get the file queued, but we need to take it away before it hits the server.
Let’s turn on Burp Suite’s proxy interceptor and then upload the file. On Burp, click Proxy on the top menu. Now let’s click on Intercept is off. You should see it change to Intercept is on:

All right! Let’s go back to the blog and hit the Import button. You should see the request get intercepted by Burp:

You’ll also notice that on the blog, the uploader is sitting idle:

According to the exploit, we need to change the file name in Burp so that it has a PHP extension. If you look just under the Content-Disposition text, you’ll see the name of your file on line 17:

Let’s take out the .jpg extension so it looks like this:

Now scroll down to line 43 and you’ll see your file name there also:

Let’s change that one too:

All right! We should be good to forward the request back to the blog. You can simply click the Intercept is on button and it will forward the request and let the blog do it’s thing:

Once you click the button, Burp should go blank and you should see the import finish on the blog. If you click on Last import you should see your file has uploaded:

Sweet! But how do we trigger it? According to the exploit, we can select our file and then hover our mouse over Download File to see where the file is stored on the server:

We’re done with Burp so let’s fix our proxy settings. Go back to the Connection Settings menu and turn the proxy off:

We can go back to the blog and click on our uploaded file. On the bottom right hand corner we should see where the file is being stored:

Let’s navigate to the address and see what’s there:

All right, it’s there! Let’s set up our NetCat listener to see if we can catch a shell:

Back on the blog, we should just be able to click Download File and get a reverse shell. Let’s see:


All right! Here’s another trick, you can open an additional listener on the same port and click on Download File again to have two reverse shells at the same time:

I love doing this because it gives me two shells: one to run privilege escalation scripts on and one to check out what I’ve found in those scripts.
Privilege Escalation
Let’s transfer linpeas.sh over to the target and see what privileges we have. First we need to see if wget is installed:

Sweet! Let’s set up a python server in the directory that has our linpeas.sh script.
If you don’t have linpeas.sh here’s the raw git hub link. Just copy it into a text editor and save it as linpeas.sh.
Linpeas.sh is in my Downloads folder so I’m going to cd over there and then set up my python server:

On the target, let’s cd to /tmp since we know that it’s writable and then transfer the script over:

Give that sucker a chmod +x to make it executable and then let it roll!
chmod +x linpeas.sh
./linpeas.sh
Now you should see it start up:

I like this script because of the colors. It just makes things a little easier to see. Sometimes, it misses things so we have to be careful, but it’s great for an easy win like a kernel exploit or a writable /etc/passwd file!
While that’s running, let’s see what we can do on our other shell. Let’s check out the home folders for the users. But first, I don’t like this shell. Let’s see if we can spawn a TTY shell using the python one-liner:
python -c 'import pty; pty.spawn("/bin/sh")'See how everything is listed vertically? Gross.

Now we’re in business:

All right, let’s cd to home.
cd /home
We have a couple of users, daisa and agi:

In Daisa’s home folder there is a user.txt flag!

All right! One flag down, let’s go for root!
Nothing in agi’s desktop so I start scrolling through the script. Nothing really jumps out at me. The script identified this configuration file:

I did a quick google search and even google told me it wasn’t the way in:

See what I mean about false positives with the script? Let’s move on and try this manually.
The script would have found simple kernel exploits or writable /etc/passwd files so let’s see what turns up on SUIDs.
Let’s run the SUID find command to see what’s what:
find / -perm -u=s -type f 2>/dev/null

What is /usr/bin/php7.2? There’s a great website for checking out SUID bit sets called GTFO Bins. Let’s head over there and see if there’s anything about PHP.

We’ll search for PHP. There’s a section!

All right. Hopefully, there’s a section about privilege escalation. Let’s check it out. If you scroll down to the bottom, there’s a section devoted to SUID:

So, from the website, we can construct our command. Let’s give it a try:
/usr/bin/php7.2 -r “pcntl_exec(‘/bin/sh’, [‘-p’]);”

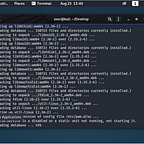
Sweet! We’re root! Let’s grab the proof.txt (OffSec anyone?).

And there it is. Not too bad. Pretty standard enumeration and some good privilege escalation techniques to practice. I hope you liked this write-up. Give me a follow @assume_breach on twitter for more write-ups!