News Headlines
- Thu, May 02
- Dragon's Dogma II rises as 3rd best-selling game of 2024 at US retail
- Thu, Apr 25
- Fallout 4 next-gen upgrade goes live
- Mon, Apr 22
- Take-Two confirms more layoffs, cancelled projects by December 2024
- Wed, Apr 10
- Microsoft and NetEase to (re)launch core Blizzard games in China
- Fri, Mar 22
- Helldivers II already top-selling game of 2024 in US during launch month
Related Articles
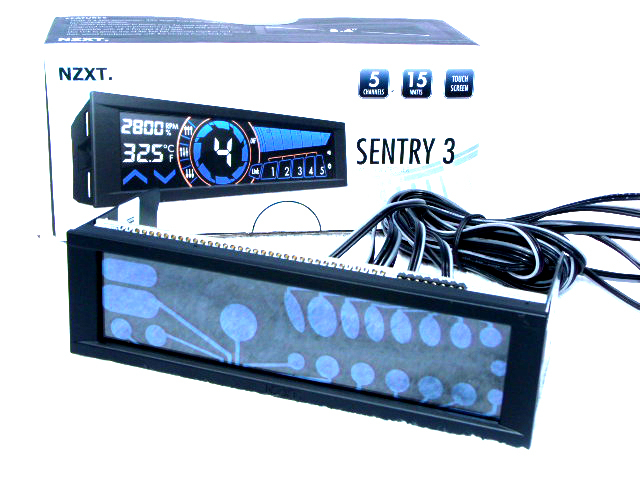
The NZXT Sentry 3 fan controller offers 5 channels, each with a 15 watt rating. With specs like that, you have the ability to control just about any case fan on the market. Surrounded by a thin bezel, 3mm top and bottom and 5mm on the sides, the Sentry 3 offers the largest (5.4 in) touchscreen yet for any single bay fan controller currently available.
When powered off, you can see the touch points of the screen (as shown in the above picture), and this does detract from the appearance. However, this shouldn't be an issue as most users will leave the display on to monitor temperature. Despite the large touchscreen, if you happen to have large fingers you'll still run into issues near the edges of the screen. Personally, I found it quite tricky to hit the power button due to it's placement close to the screen edge.
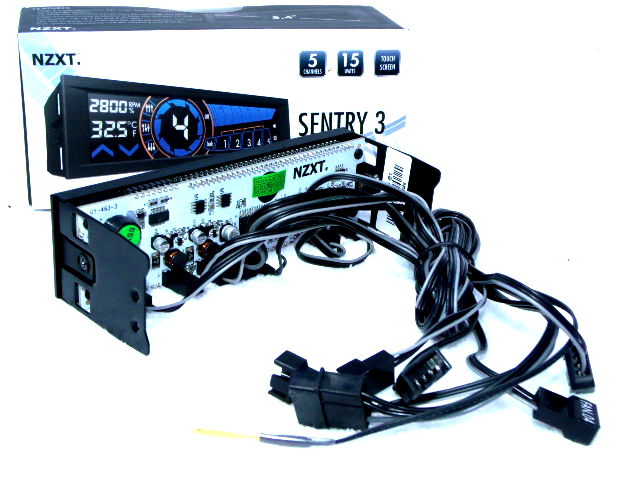
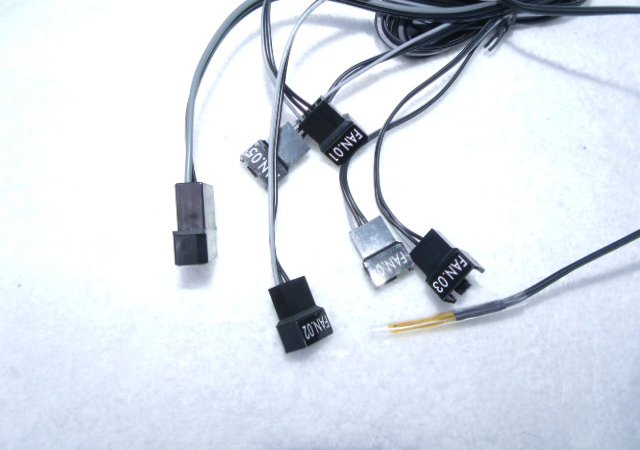
Along with the 5 fan connections, there is a 4-pin molex for power and a temperature sensor. Each of the 5 fan connections will support either a 3-pin or 4-pin fan and are clearly marked, making installation a breeze. Although the Sentry 3 allows connection of 4-pin fans, it will not use any PWM features the fan may have since the Sentry 3 controls fan speed through voltage adjustment.
The single temperature probe is protected during shipping by a plastic sleeve. Although these types of probes are fairly sturdy I wouldn't suggest you place it between your heatsink and CPU. In the instructions, NZXT suggets taping the temperature probe to the edge of the CPU, which is how I mounted it. Please note, in this location the temperature reading will be lower than the on chip sensor. In my test system I found the temperature reading to be anywhere between 5 to 10 degrees cooler than shown in HWMonitor or BIOS. Each of the fan connections are removable and the cables are long enough to reach any location in just about any case size. This allows for more effective cable management.
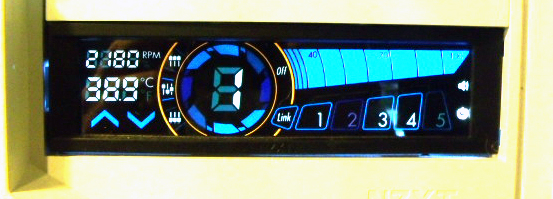
First off, i want to apoligize for the color on the above picture, I had to use a couple of new CFL bulbs; they cause a yellowish tint to anything white that is hard to edit out. When the Sentry is powered on, it glows with a soft blue color. On the bottom left you can see the current temperature (as reported by the sensor). Directly above that is the RPM of the currently selected fan, while the RPM adjustment buttons for the current fan lie blow. This adjustment is in increments of 10 percent. To the right is the Full, Manual and Silent program settings. As with most fan controls, the Full and Silent settings are factory set can be adjusted. Pressing that large number near the center changes which program setting you're using. This area also has an animation showing the relative fan speed. The largest portion of the touchscreen to the right is the slide speed control and fan selector. In manual mode, sliding your finger from left to right increases fan speed in 10 percent increments from not running (0 percent) all the way up to full speed (100 percent).
A nice feature that the Sentry 3 offers is linking fan channels. Say you have 2 fans on your CPU cooler or radiator and of course you want them both to be at the same speed. If one is plugged into channel 1 and the other is on channel 2, you can link them so that they both are controlled together.
I used the linking feature for the 2 fans on my radiator and was able to control both fans with one swipe of a finger from between zero to 100 percent and anywhere in between with no problems.
Of course the other way to do this would be to use a splitter and connect both fans to sthe same channel. Depending on your fan choice, you could connect multiple fans to each channel, just keep in mind that each channel has a maximun of 15 watts. For instance you could have 6 Bitfenix Spectre Pro LED (at 0.18A which works out to around 2.16 watt per fan) fans per channel, for a total of 30 fans! Unfortunately I don't have 50 fans nor the needed connections to test this, but in theory it should work.
In my test I had a total of 4 fans connected: 2 case fans (front intake and rear exhaust) along with the 2 fans on my radiator. By setting the speeds for each fan (one linked pair in the case of the radiator fans), I was able to control the air flow quite well and keep the system cool.
Article Index
|
|
Comments
